Introduction to Homecloud
Welcome to the official Homecloud Technical Documentation hub.
Homecloud is an integrated private cloud platform designed to provide organizations,enterprises and individuals with total data sovereignty, zero monthly SaaS subscriptions, and seamless remote VPN connectivity.
🚀 Key Features
- Private Data Sovereignty: All documents, credentials, and digital assets remain on physical, localized hardware under your control.
- Complete Open Source Apps: Trusted, Community driven open source applications to provide zero technology lock-in and data portability.
- Zero-Trust Access: Encrypted VPN remote connectivity for multi-location teams without exposing ports directly to the public internet.
- Data Safety: Multi-destination encrypted backups (local USB + offsite cloud repos via Duplicati).
- Ease of Use: Consumer grade device with a simple web interface for managing users, devices, and apps.
🔓 First time setup of Homecloud device
For first time setup of Homecloud device, follow the steps at https://homecloud.cloud/getstarted/#
Once you have logged in to admin console follow the setup wizard to configure network, VPN, and other settings.
You can also configure these settings manually by navigating to Configure section in admin console. Refer below sections for more information.
Configure Notifications
Homecloud device can send notifications to your email address for important events like system updates, security alerts and password reset requests.
It is recommended to configure email notifications to reset admin password.
Navigate to Configure > Notifications Settings section in admin console and follow the instructions to setup email notifications.
To maintain privacy, Homecloud uses your email address only for sending notifications. You will need to configure SMTP server setting to send email notifications. You can use your own SMTP server or use a free SMTP service like Gmail, Outlook, etc.
Generate an app password for your email account and use it as SMTP password to send email notifications.
Admin Email Id is where you will receive notifications from Homecloud device. It can be the same account from which you will send email notifications. Make sure this account is accessible to you and is secured.
Set up VPN
Homecloud, by default is accessible over your local network at the IP address assigned by your router.
To check the IP address of your Homecloud device, press the 'Multi-function' button on right side of device.
It will cycle through the information and display the IP address on the front panel like the picture below.

Homecloud can be integrated with Tailscale VPN service (3rd party service) to provide secure remote access to your Homecloud device.
Login to admin console via IP address and navigate to Configure > VPN > Configure section and follow instructions to setup Tailscale VPN.
Once VPN is configured, install Tailscale client on your access device (laptop, mobile, etc.) and login with the same Tailscale account used to configure VPN on Homecloud device.
After VPN configuration, Homecloud will get a stable name like homecloud.tsxxxx.net which can be used to access your Homecloud device remotely over VPN.
To find this name, login to admin console and navigate to Configure > VPN > Configure section and check the Tailscale hostname.

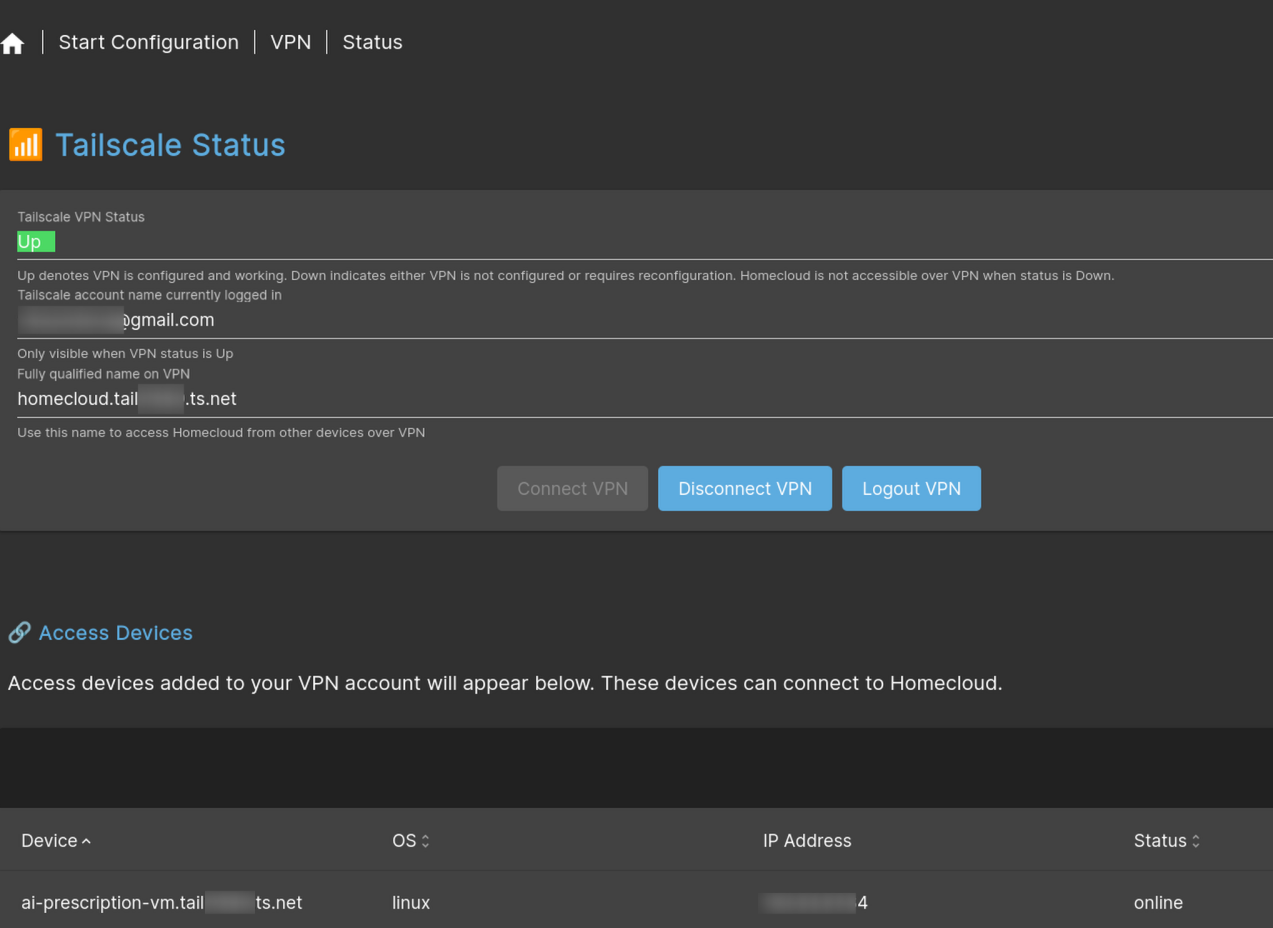
To check if your access device is connected to Tailscale VPN network, navigate to ** Configure > VPN > Status** section in admin console. It will also show the list of devices connected to Tailscale VPN network.
Using without VPN
Without VPN, Homecloud device can be accessed only from your local network. VPN also provides a stable name to access your Homecloud device both locally and remotely. If you choose not to use VPN, you can access your Homecloud device using the IP address assigned by your router. Since IP address assigned by your router may change over time, it is recommended to configure a static IP address for your Homecloud device.
DHCP Reservation
In your DHCP server or router, you can configure a static IP address for your Homecloud device. It is commonly known as DHCP reservation.
Refer to your router's documentation for instructions on how to configure DHCP reservation.
Once you have configured a static IP address, you can access your Homecloud device using the static IP address from your local network.
This will ensure that your Homecloud device is always accessible at the same IP address from your local network.
Static IP Address Configuration
If you don't have admin access to your DHCP server, you can configure a static IP address on your Homecloud device.
On admin console, navigate to Configure > Network > Intefraces section select Wired device, press the edit 🖊 button .
Under IPv4 settings, select method as Static and enter the static IP address, netmask, and gateway.
Click Save and apply the changes when prompted.
Note: Assigning static IP address on Homecloud device may cause IP conflicts if the address is already in use on the network. So choose the IP address carefully and ensure that it is not in use by any other device on the network.
Next Steps
Setup Drive App: https://docs.homecloud.cloud/drive
🛠️ Quick System Reference
- Official Product Portal: https://homecloud.cloud